How to Color Match Your ColorEdge Monitor and Photo Prints
Mac OS x EPSON x Photoshop Elements 11
How to set your printer
| OS | Printer | Image Software |
|---|---|---|
| Mac OS | EPSON Stylus Pro Series | Adobe PhotoShop Elements 11 |
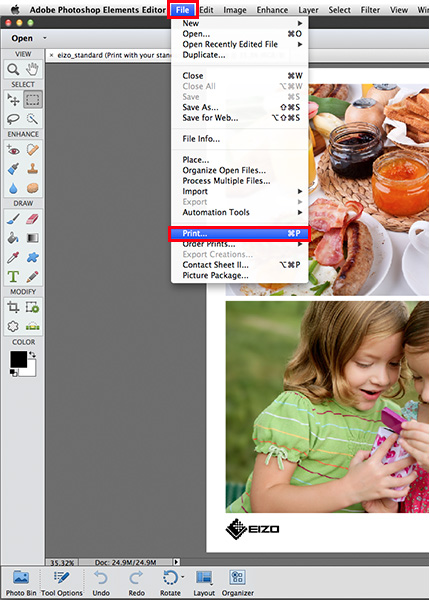
1. In Adobe Photoshop Elements, go to File > Print.
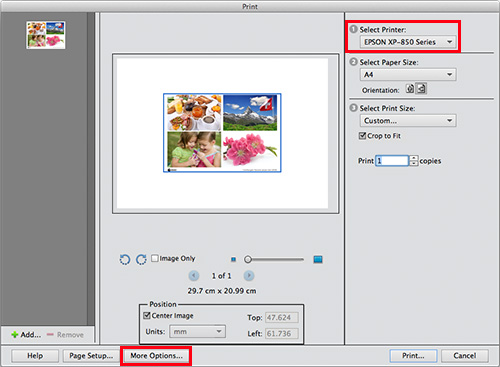
2. In the print window, choose your printer under Select Printer and click More Options in the lower left.
3. In the More Options window, select the Color Management tab. For Color Handling, select Photoshop Elements Manages Colors. Under Printer Profile, select the paper profile you will be using and for Rendering Intent, select Relative Colorimetric. Click OK.
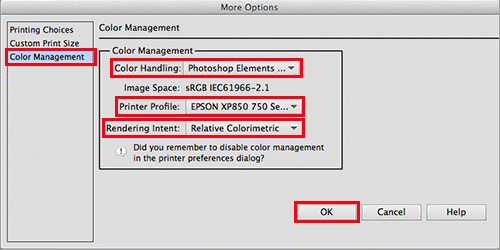
・Rendering Intent
Under Rendering Intent, you can choose between Perceptual and Relative Colorimetric. Perceptual compresses the entire color gamut to match the color gamut that can be reproduced by your printer. Using this option it is possible for many colors to deviate from the color gamut that can be printed due to the to the connecting color gradations. However, Relative Colorimetric is a setting that allows the colors that cannot be reproduced by your printer to be converted into those that closely resemble them without compressing the color gamut. This method prioritizes the color reproducibility in the printable color gamut.
4. When you return to the print screen, click Print.
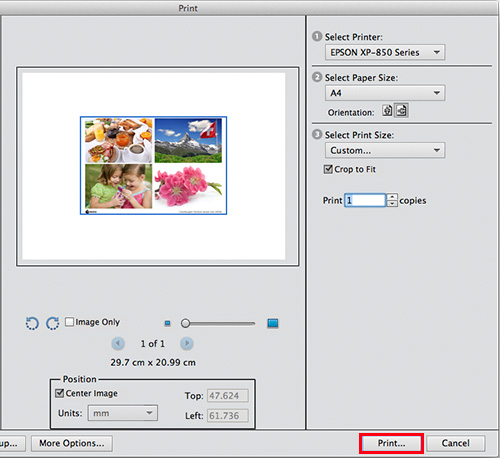
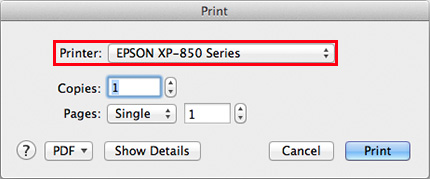
5. In the new print window, reconfirm your printer and click Show Details if they are hidden.
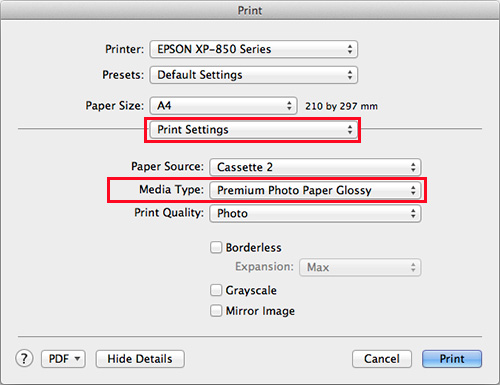
6. Select Print Settings from the center menu and set the Media Type to the desired paper (ex. Premium Photo Paper Glossy).
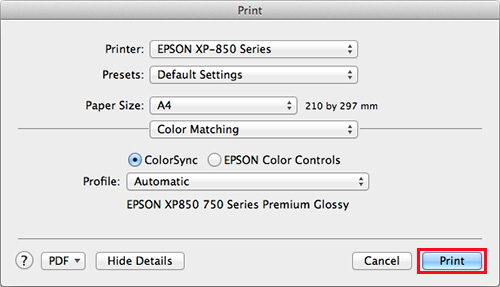
7. Now select Color Matching from the menu in Step 4, make sure that Color Sync is checked, and click Print.
![Once you have successfully printed, return to Monitor Adjustment. Select your desired adjustment software. [Monitor Adjustment]](http://www.eizo.com/global/library/management/matching/printer/step_07_02.jpg)
 |
 |

- You can use the above map to return to any section of this guide.