How to set your printer
| OS | Printer | Image Software |
|---|---|---|
| Windows 7 | Canon PIXMA Pro Series | Adobe Photoshop CS6 |
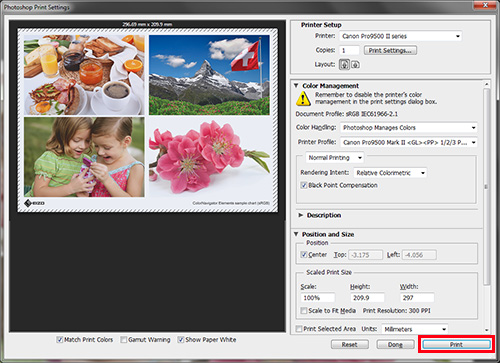
1. In Adobe Photoshop, go to File > Print.

2. Select the Color Management tab in the print settings window and for Color Handling, select Photoshop Manages Colors. Under Printer Profile, select the paper profile you will be using and for Rendering Intent, select Relative Colorimetric. Check the box for Black Point Compensation. Choose the printer name and click Print Settings.
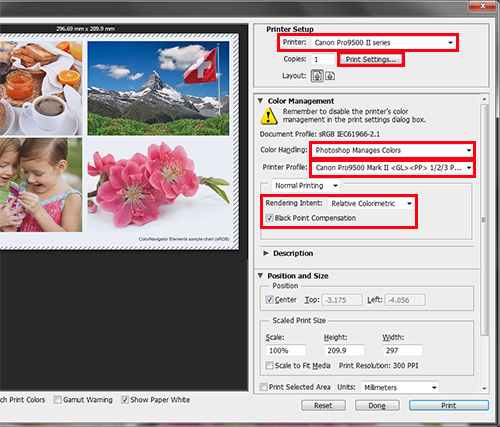
・Rendering Intent
Under Rendering Intent, you can choose between Perceptual and Relative Colorimetric. Perceptual compresses the entire color gamut to match the color gamut that can be reproduced by your printer. Using this option, it is possible that many colors could deviate from the printable color gamut due to the connecting color gradations. However, Relative Colorimetric is a setting that allows the colors that cannot be reproduced by your printer to be converted into those that closely resemble them without compressing the color gamut. This method prioritizes the color reproducibility in the printable color gamut.
・Black Point Compensation
This is a setting to correct the absolute values of the difference in black point compensation when converting RGB to CMYK values. By checking this option, the low tone gradations are uniformly preserved, giving you a natural final product.
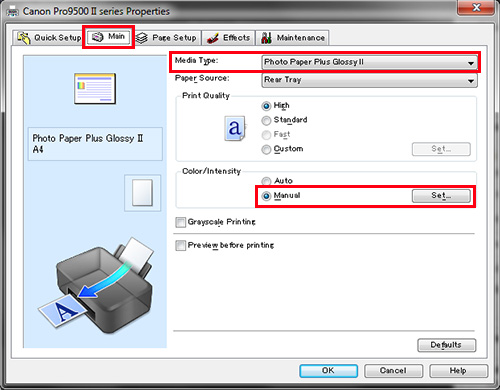
3. Select the Main tab in the printer properties window. Set the paper you will use under Media Type (ex. Photo Paper Plus Glossy II). Under Color/Intensity select Manual and click the Set button.
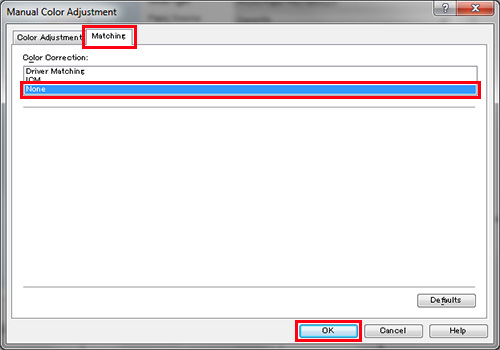
4. On the Manual Color Adjustment screen, select the Matching tab. We will print using the Photoshop Manages Colors option you selected in Step 2, so for Color Correction, select None. Click OK.
5. Click OK once more to return to the print screen.
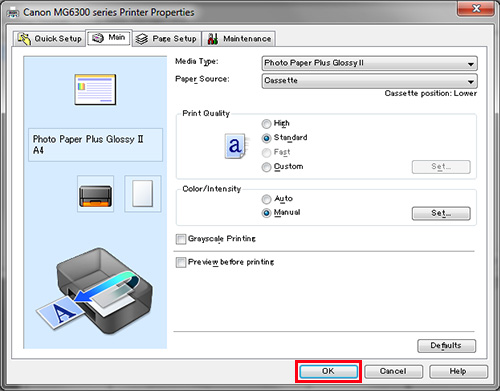
6. When you return to the print screen, click Print.
![Once you have successfully printed, return to Monitor Adjustment. Select your desired adjustment software. [Monitor Adjustment]](http://www.eizo.com/global/library/management/matching/printer/step_07_02.jpg)
 |
 |

- You can use the above map to return to any section of this guide.